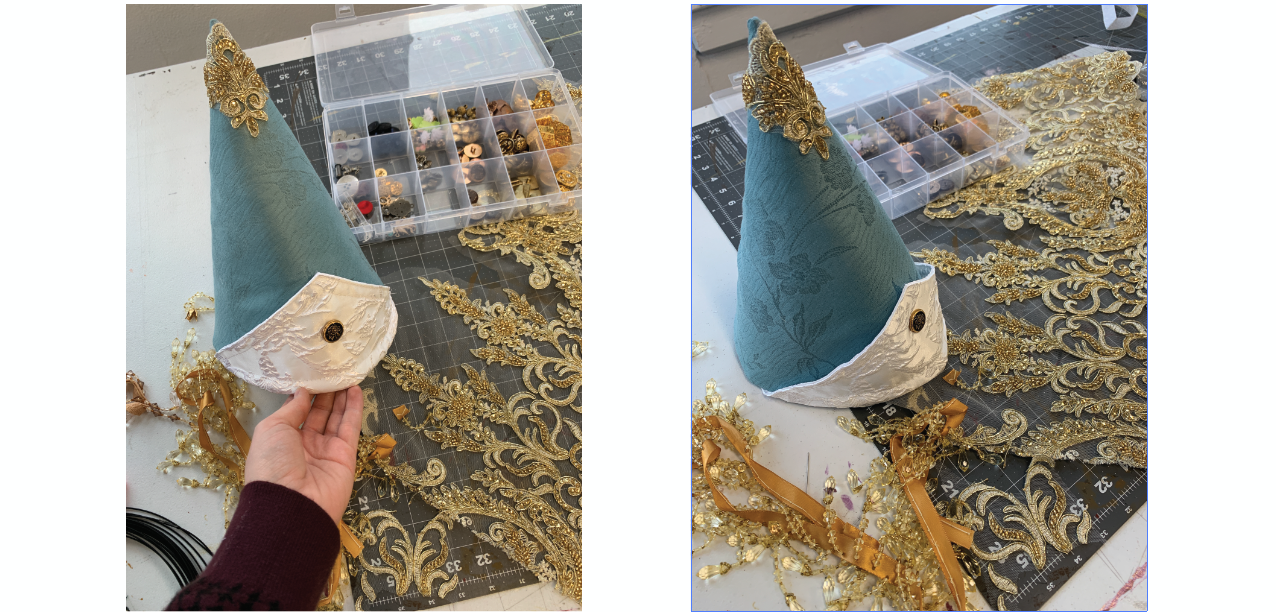
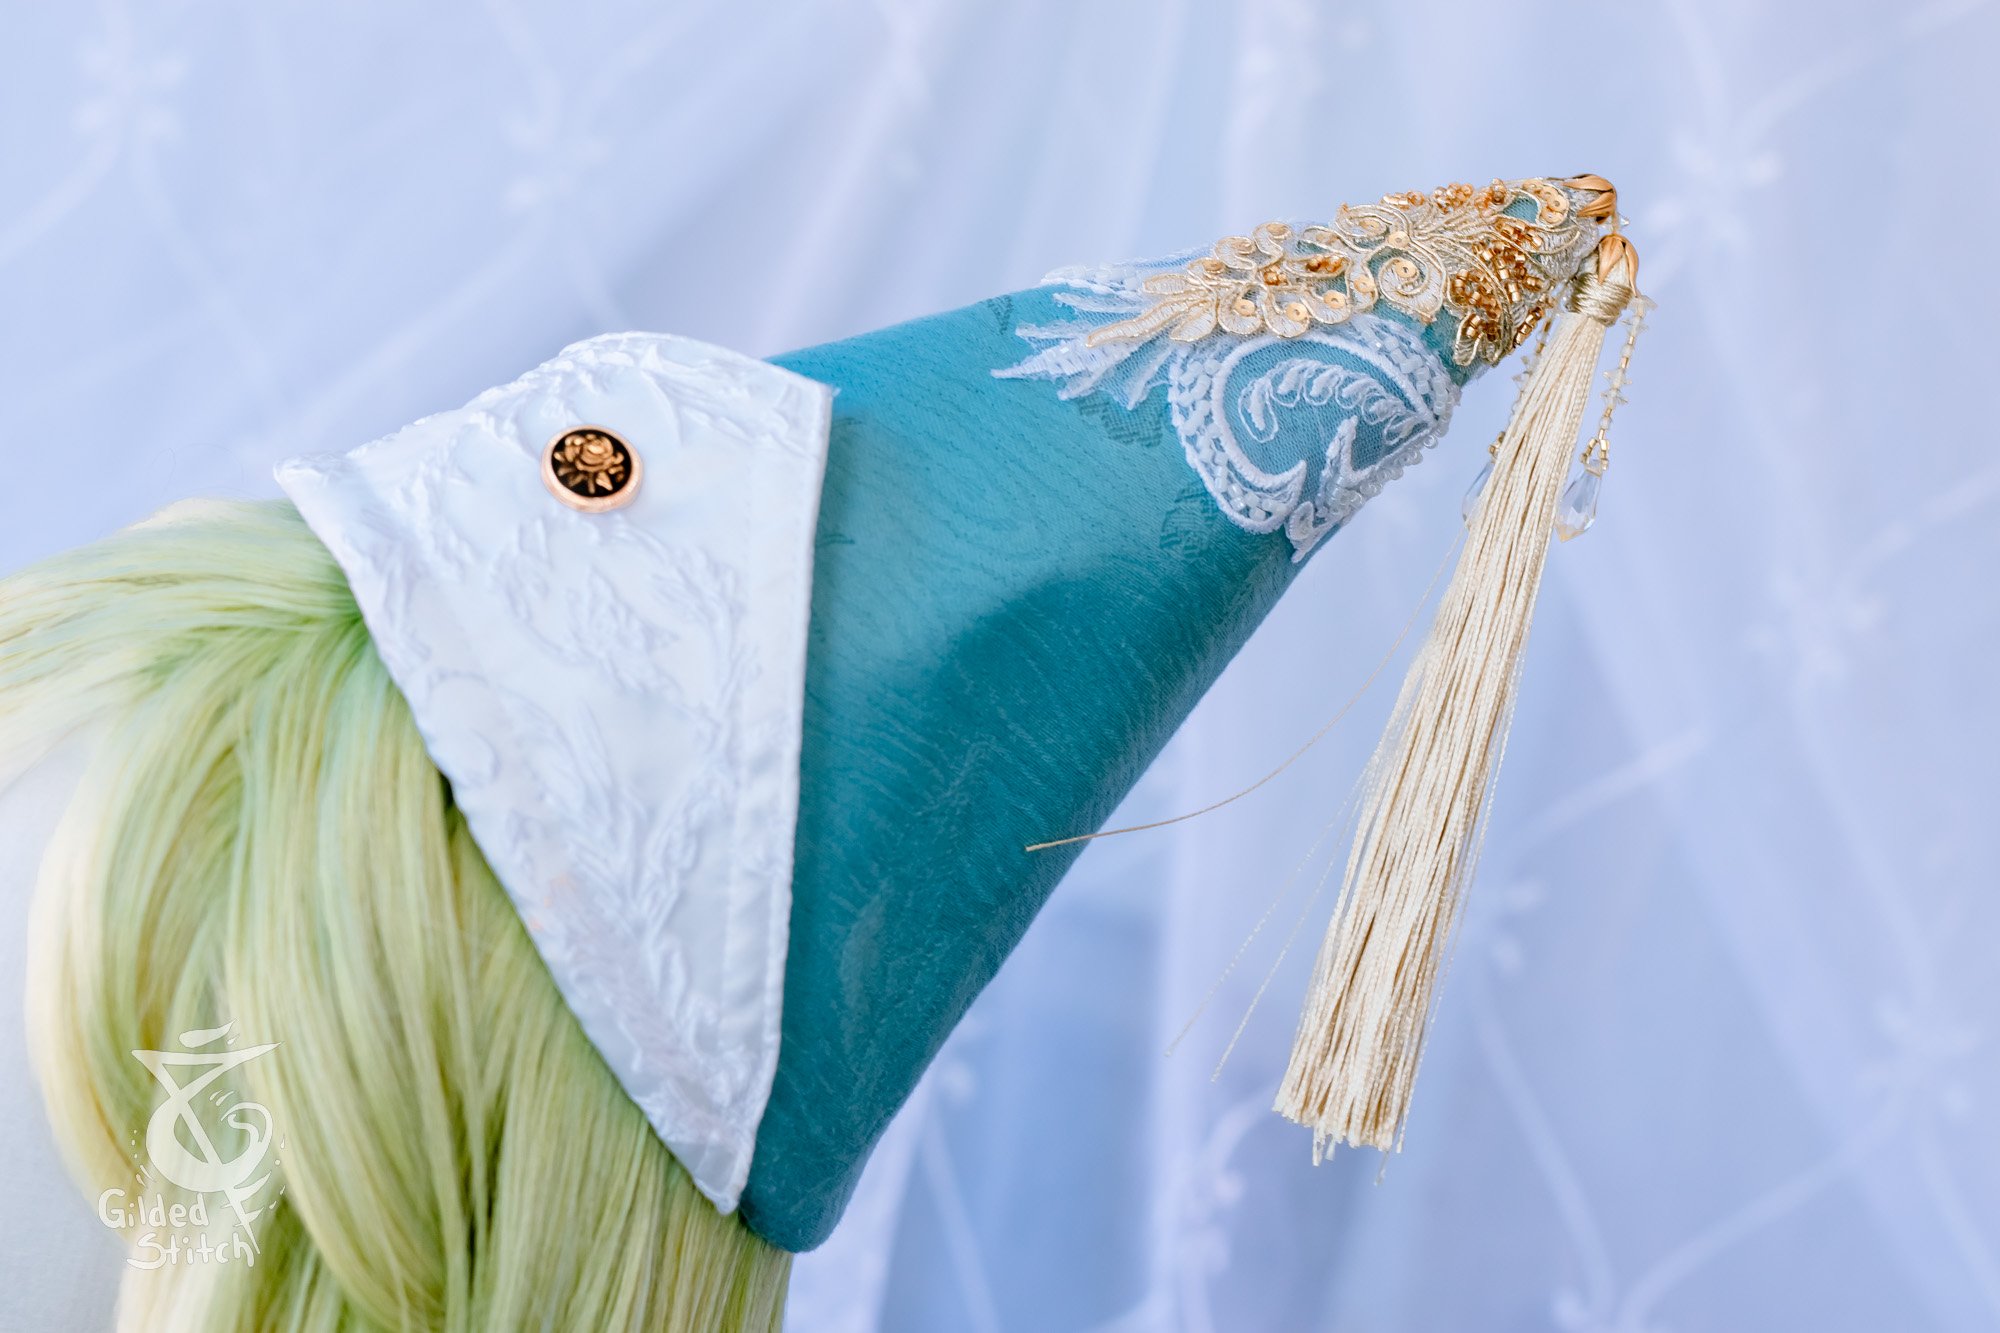
Make A Witch Hat Atilier Hat
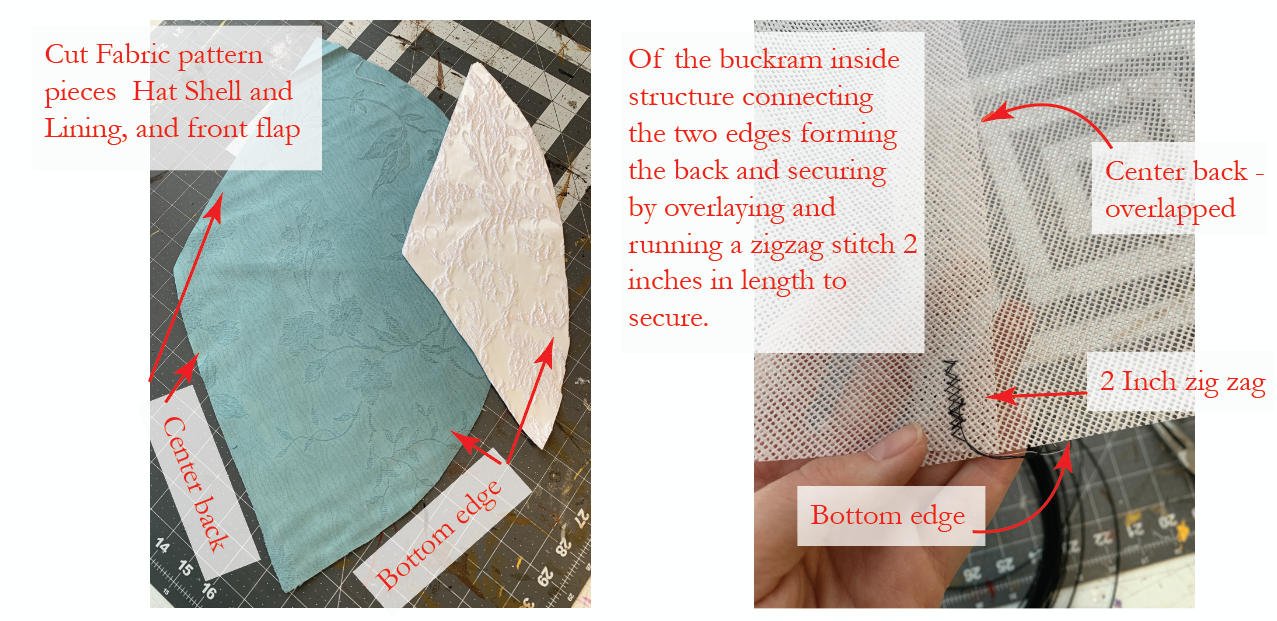
Print, assemble and cut all your pattern pieces from the paper.
Cut out all pattern pieces from fabric as directed to on the paper pattern, and cut the inner structure for the hat. This tutorial will be using Buckram as an inside stabilizer. Eva foam is a good alternative.
Close the center back of the Buckram base connecting the two back edges, overlapping the two edges, and sew about a 2 inch in length zigzag stitch on the overlap to secure it.
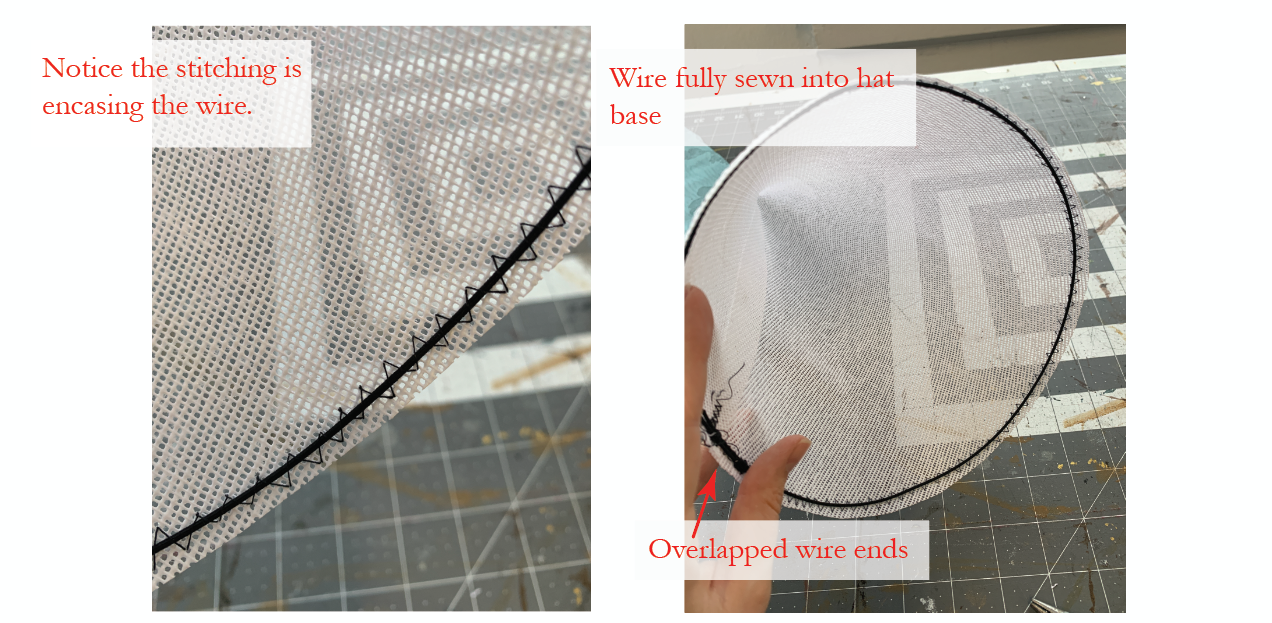
Measure the circumference of your hat opening. Cut a length of wire that is 2 inches longer than that measurement. Using a wide zigzag stitch, sew the wire into the bottom edge of the hat. When reaching the end overlap both ends in the stitches. Do be very careful for this step. It’s recommended to wear safety glasses in the event that your needle breaks.
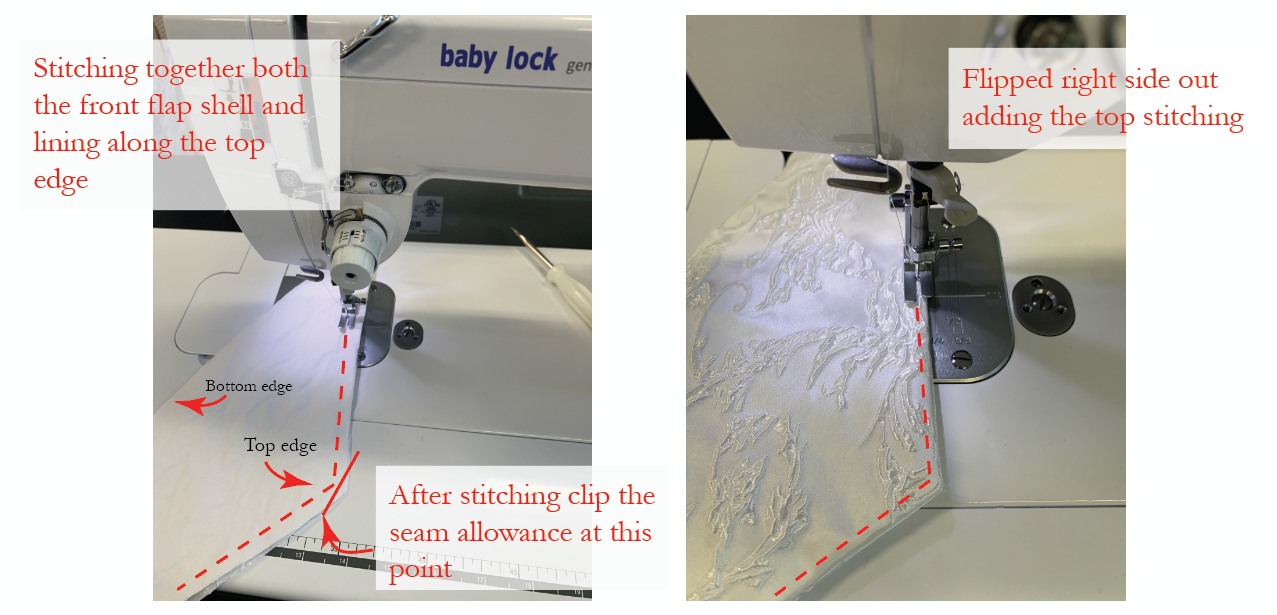
Moving on to the fabric, with right sides together, sew Front Flap shell and lining together along the top edge. Leave the bottom edge open. After sewing, snip the top corner seam allowance away, don’t snip through the seam. Pull this right side out and iron flat. Add a top stitch to keep things nice and crisp.
I have used interfacing for extra stability on my hat shell. This is the white fabric inside the shell you are seeing now.
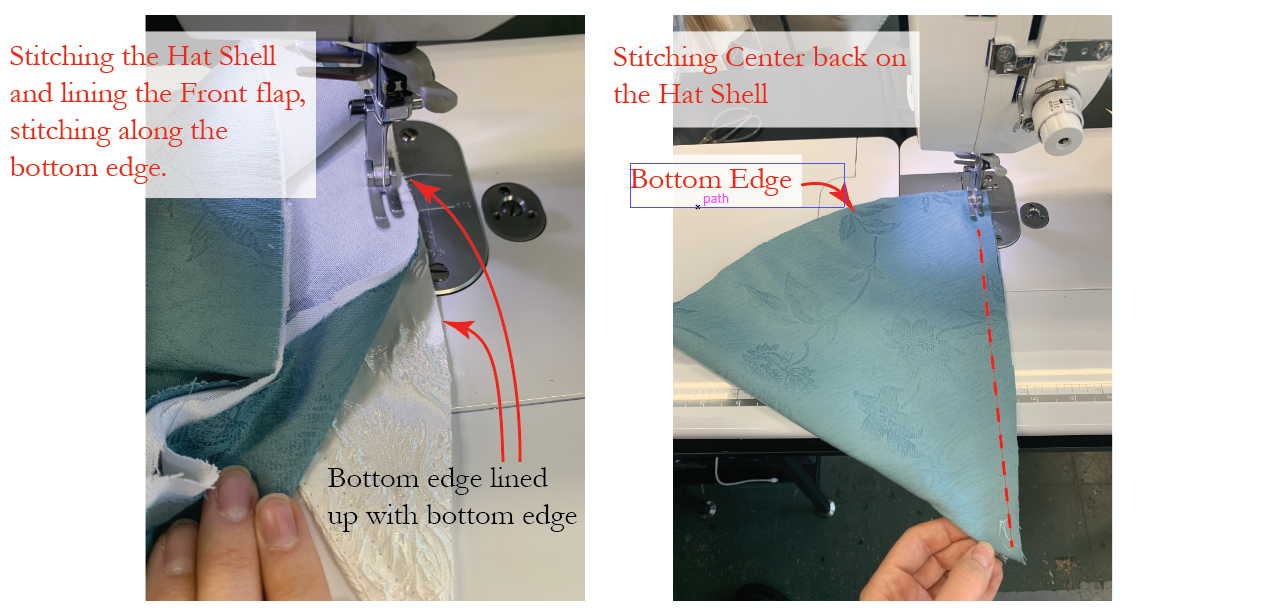
Place Front Flap lining side to Hat Shell right side, line up the bottom edges of both. Make sure the center back of each are also lined up making the Front Flap and Hat Shell the same width. Use a basting stitch along the full bottom edge to hold together these pieces.
Fold both Front flap and Hat shell in half lining up to center back, sew center back closed.
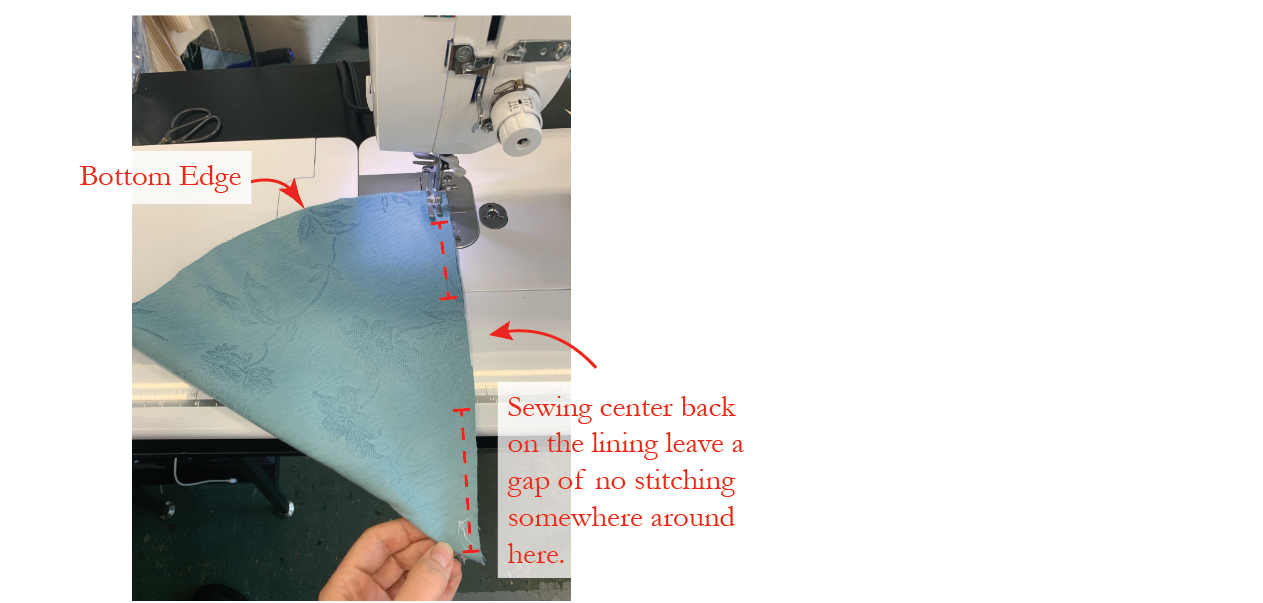
For the lining of the Hat, repeat that step - fold both Front Flap and Hat lining in half, right sides together and sew about 2 inches up from the bottom edge, stop, create a gap large enough to fit your hand and then continue the stitch to the point of the hat. This gap will be important later.
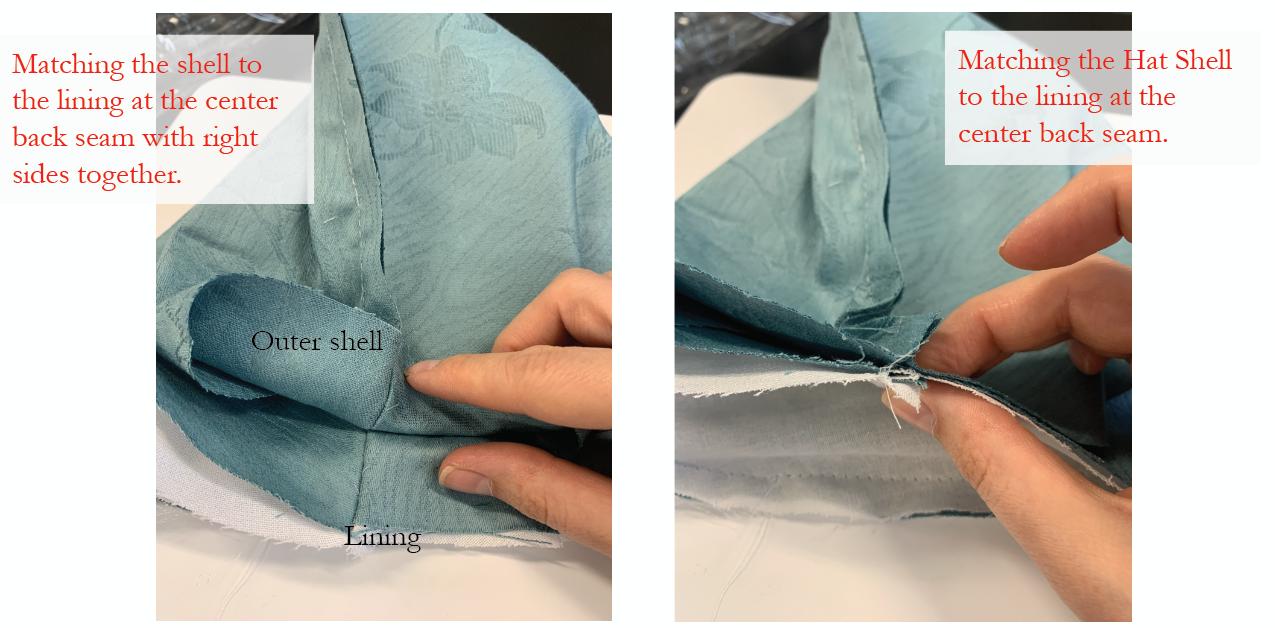
Right sides together, line up the Hat Shell and the lining, matching up the center back seems. Sew closed the bottom edges together.
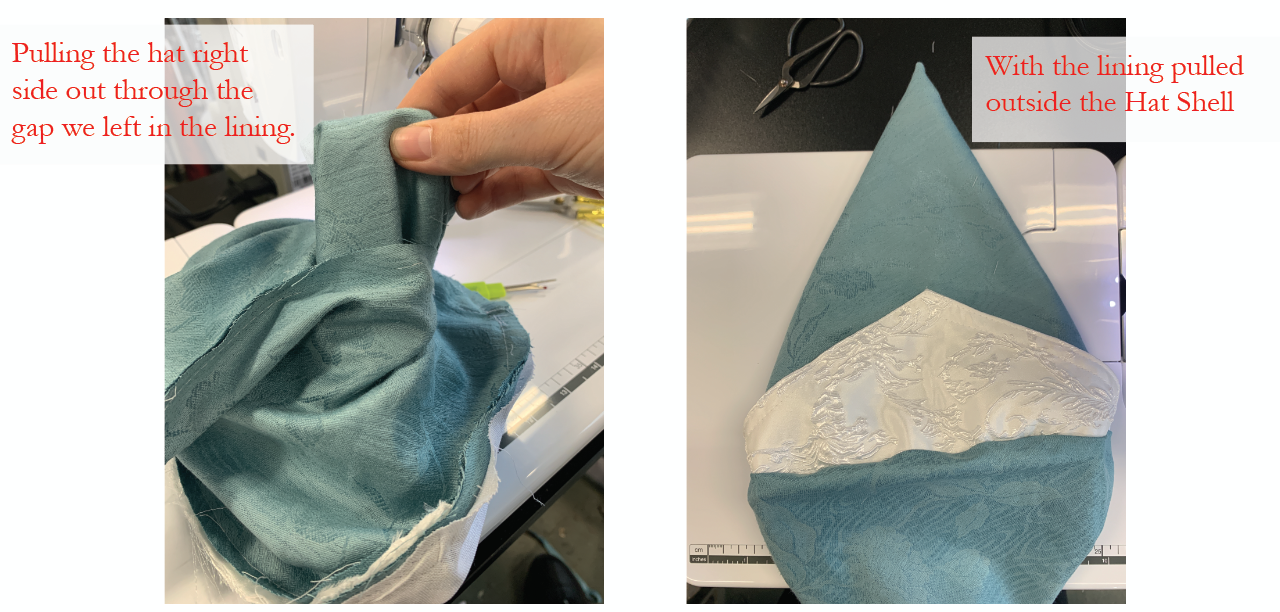
Pull the Hat Shell and Lining right side out by drawing the fabric through the unsewn center back of the lining. Pull the lining outside of the hat for now.
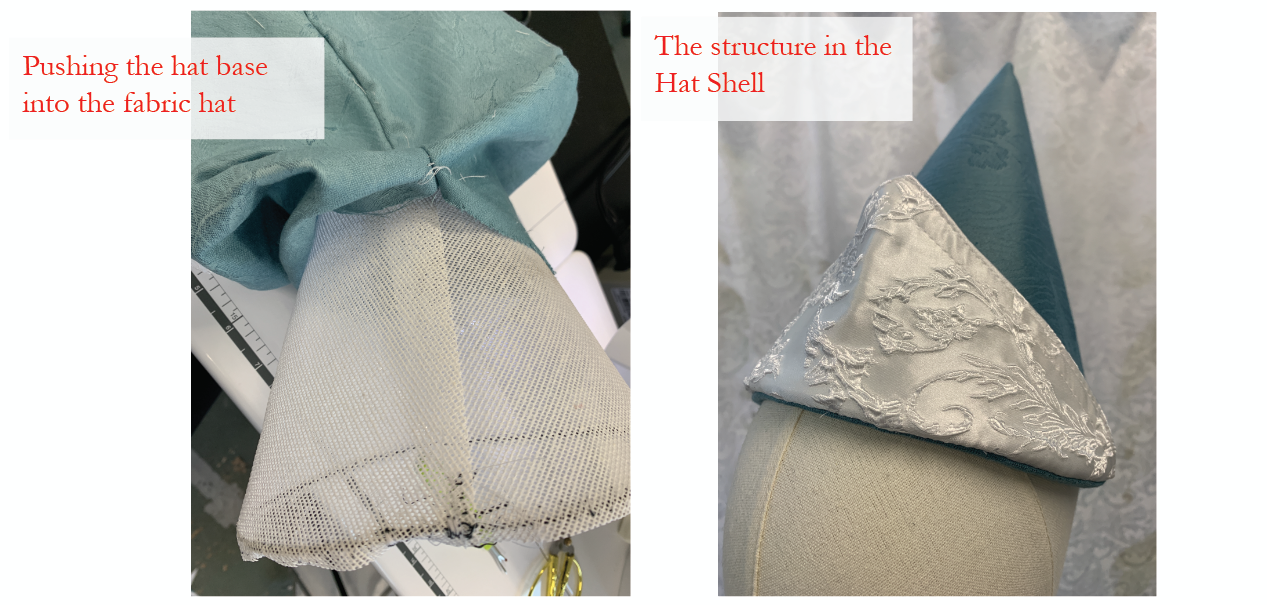
With the hat inside structure, lightly fold it/scrunch it to fit into that same center back opening. This does take some handling and patience to not warp the structure piece and get it in. If you are having a hard time fitting the base into the opening, it’s okay to pick some of the stitching to make a larger opening.
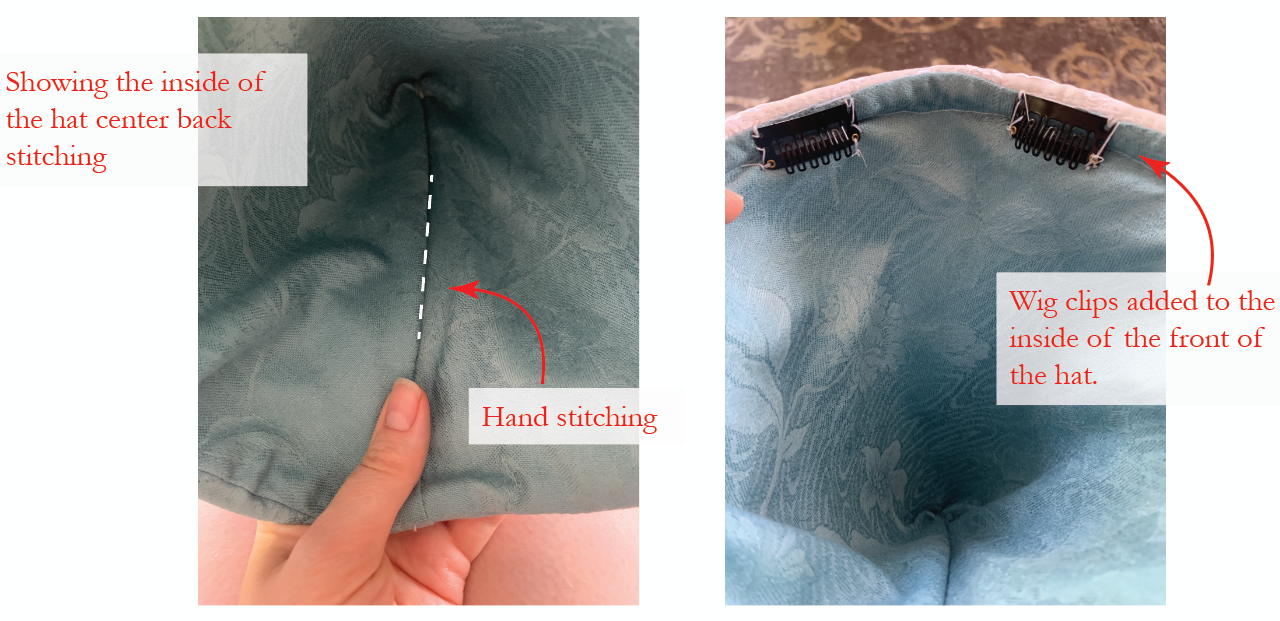
Use a needle and thread to close the gap in the lining. A whip stitch or ladder stitch is recommended. The hat base is now complete
On the inside of the hat along the bottom edge hand sew wig clips.
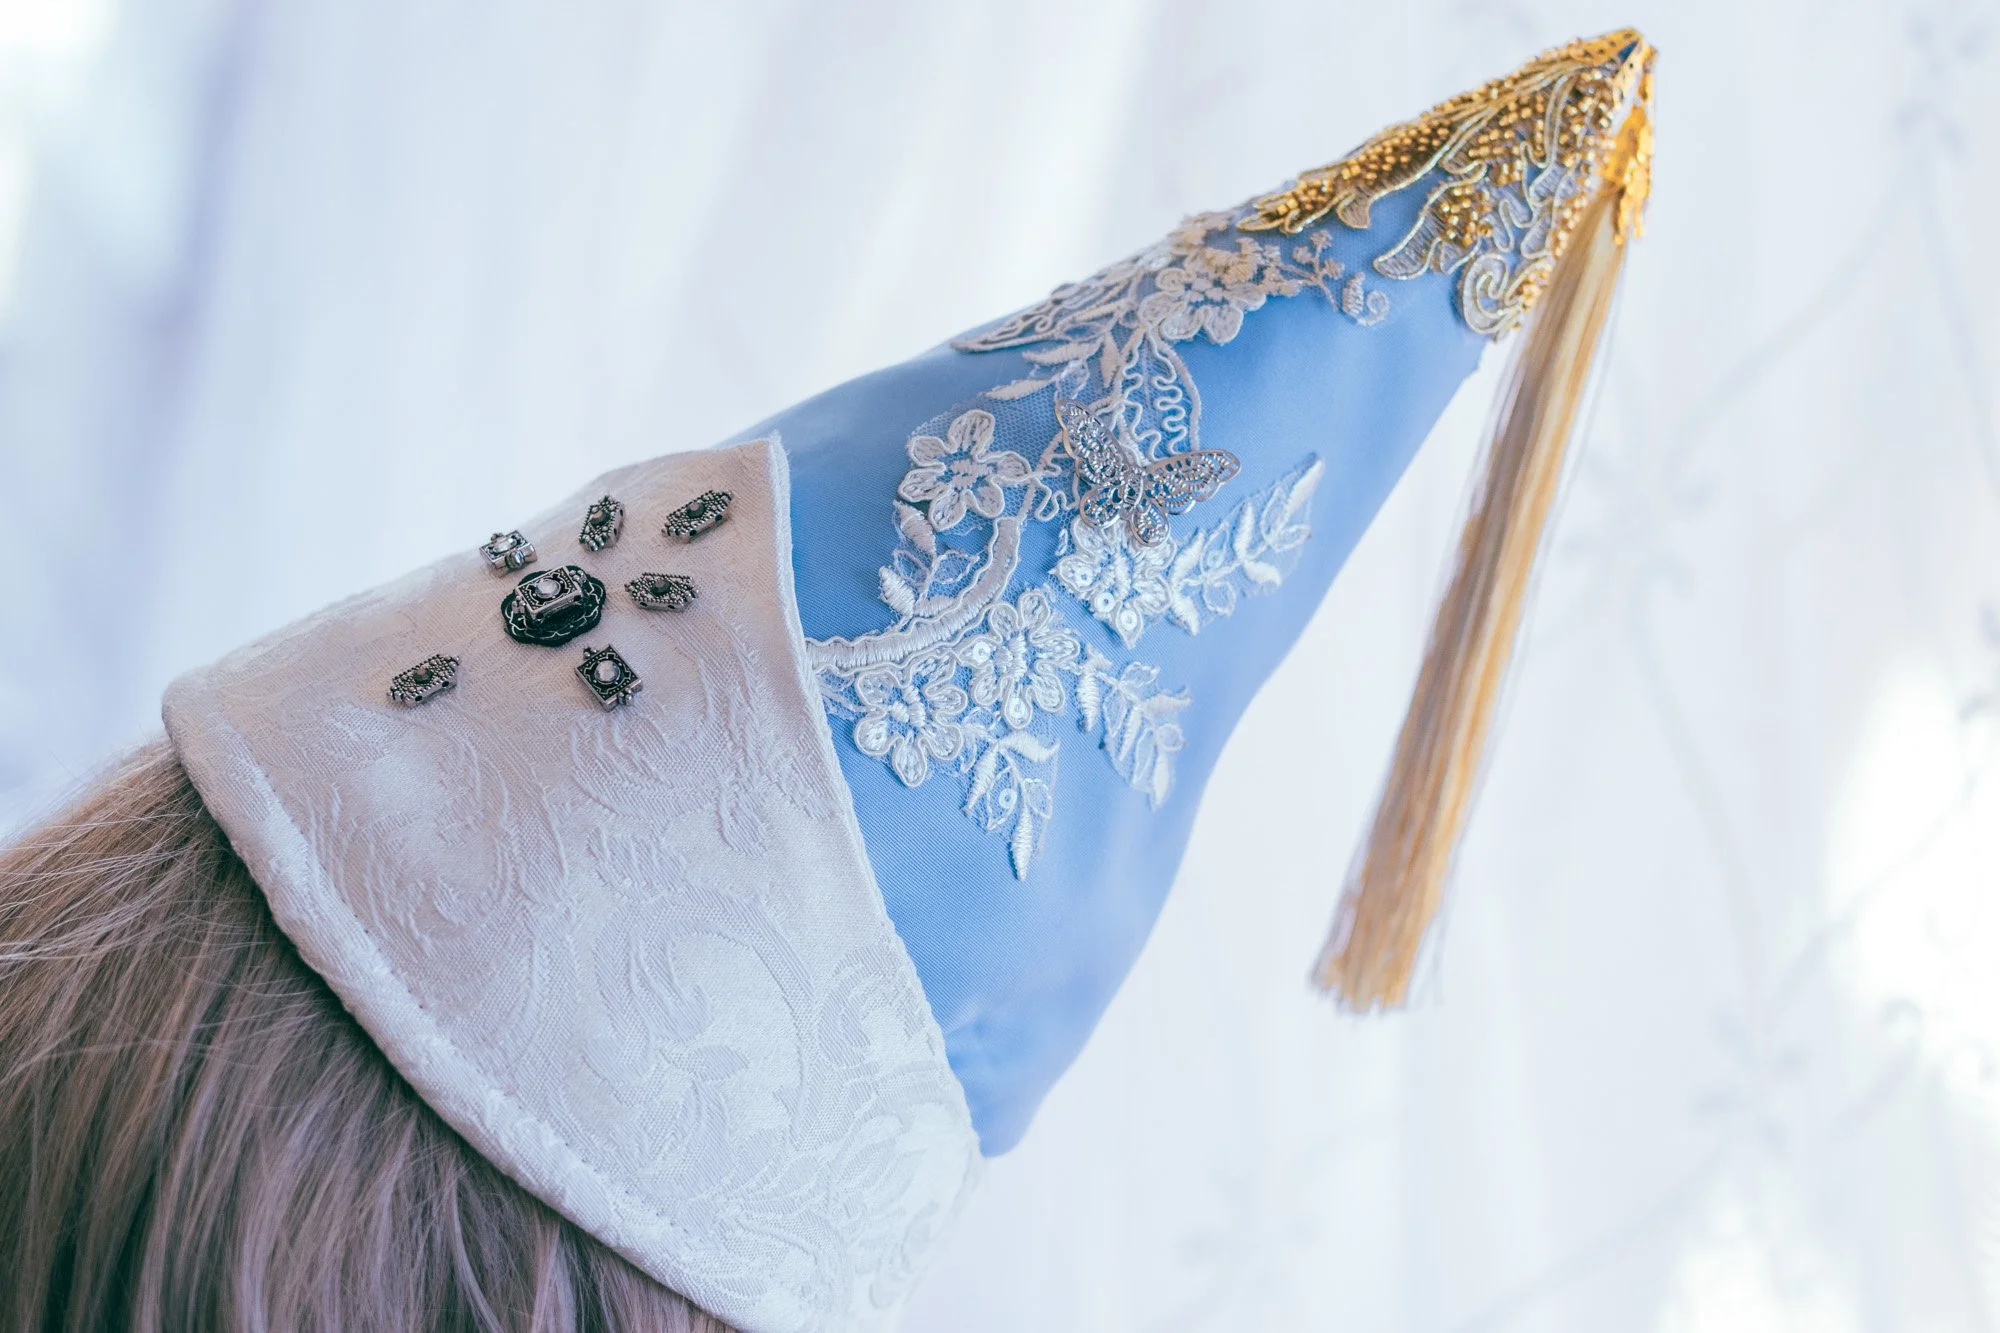
Add lace or trims to outside of hat where you like it.
Once the embellishing is complete, using a needle and thread attach tassel to the top of your hat. You can make the tassel fancy with a bead cap or filigree details.
Sew on the button of choice to the front flap.